Wifit is a program to create images for E-Paper Displays (available at Adafruit). It is written in Python using the amazing Python Image Library.
Features:
Download: Right now wifit.py is only available as a source zip file (or Fork me on GitHub!) The py2exe build has one quirk right now that prevents you from writing text. Hopefully we will get that worked out soon. Wifit.py requires python2.7, PIL, and numpy.
Commands: After you download the entire directory as a zip file, start EPD/libraries/EReader/examples/Album/wifit.py from the command line or by double clicking the file icon from windows explorer.
The default image will be displayed. Familiarize yourself with the controls:
- left-mouse-click: select image or text
- left-mouse-drag: translate image or text
- right-mouse-drag: scale image or text
- ctrl-c: copy selected image or text
- ctrl-v: paste selected image centered under mouse, or paste image at web url
- type “I”: insert BigAscii text box
- type “i”: insert Unifont text box (normal ascii)
- <RETURN>: Exit text mode
- <ESC>: Exit text mode
- <DELETE>: Delete selected image or text
- <CTRL>-i: Invert an image (black/white)
- <CTRL>-c: Copy selected image
- <CTRL>-v: Paste copied image (or paste image from url)
- <CTRL>-r: Rotate image 90 degrees counter-clockwise
- <CTRL>-h: Flip image horizontally
- <CTRL>-u: Flip image vertically
- <SHIFT>-<UP>: Nudge image up
- <SHIFT>-<DOWN>: Nudge image down
- <SHIFT>-<LEFT>: Nudge image left
- <SHIFT>-<RIGHT>: Nudge image right
Menus:
- File–>Open: Open a new image file (close current image)
- File–>Save: Save current view port image in WIF or png
- File–>Exit: Quit the program
- Size–>EPD_LARGE, _MED, _SMALL: Set view port size to EPD standard sizes.
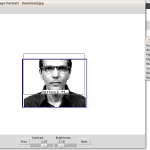
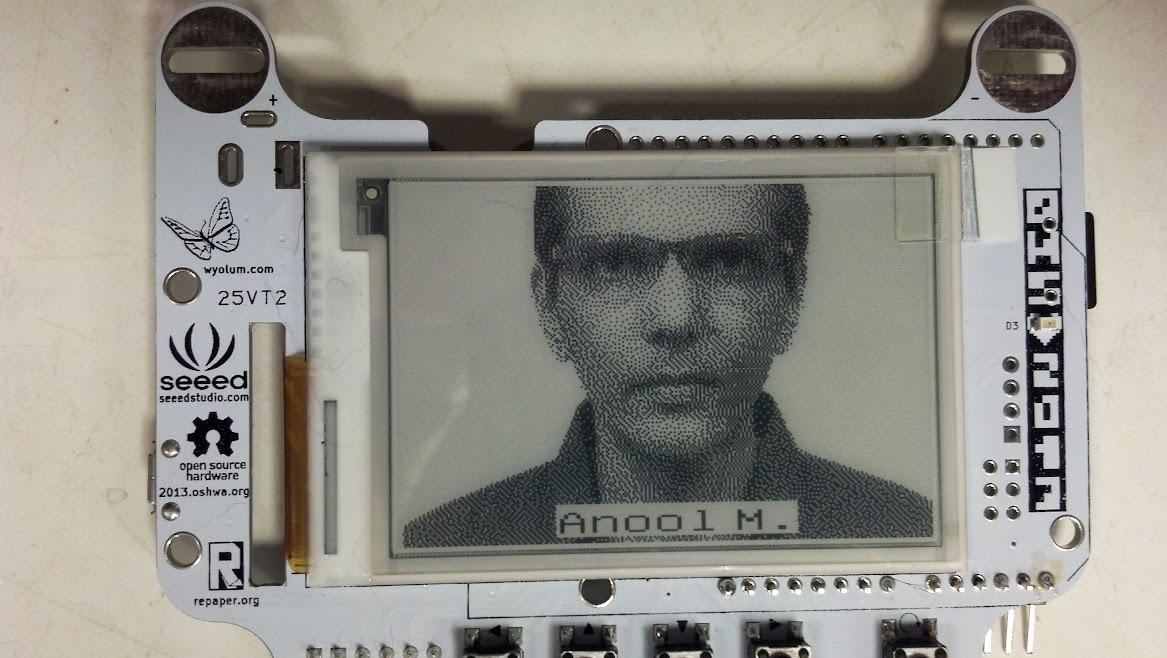
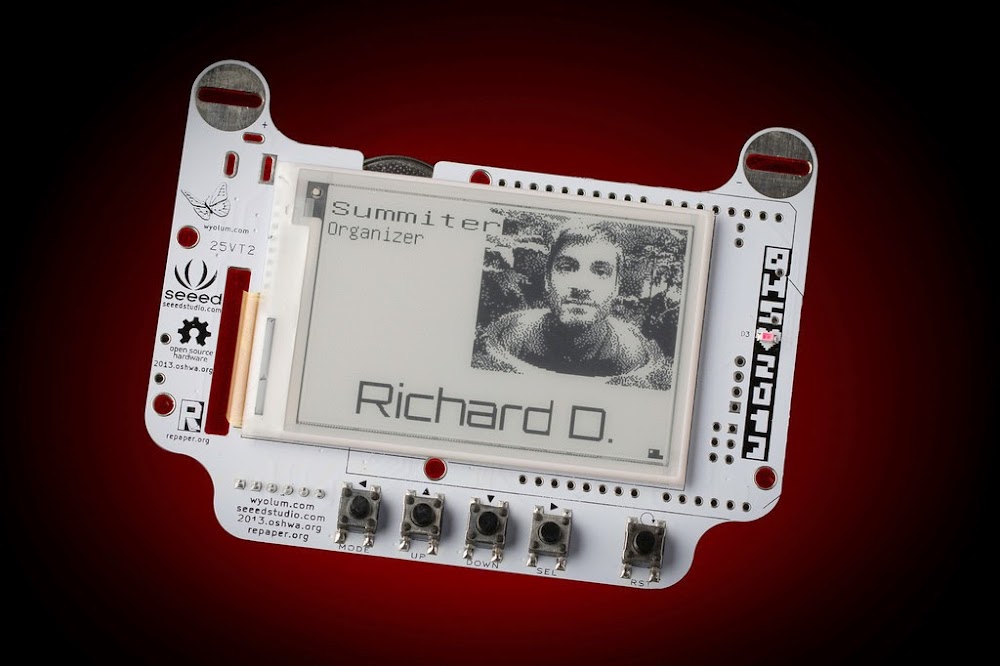
- Size–>Headshot: Set view port to standard headshot size for badges.
- Insert–>Image: Open new image on top of old image. Images can be edited independently.
- Insert–>Big ASCII Text: Start typing in 16×16 pixel font
- Insert–>Unifont Text: Start typing in (mostly) 16×8 pixel font
- Insert–>5×7 Text: Start typing in 5×7 pixel font
- Insert–>4×4 Text: Not implemented
Use it!
This example will work with any Arduino compatible with an SD card (like AlaMode).
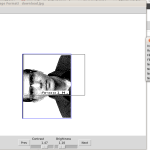
Now lets use wifit.py to make our badge for the Open Hardware Summit. The badges will come pre-loaded with the information you provided at registration. But you will want to customize it.
1. Start wifit.py and delete the default image after you have played around with it.
2. Select a photo from the web by right clicking in your browser and selecting “copy image url” and pressing ctrl-v to paste in wifit. A Google image seach of “wyolum” produces a lot of cool pix.

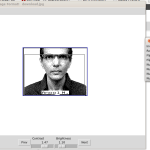
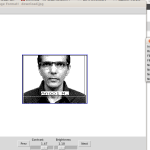
3. Adjust the image: move the image to the desired location (right-drag) and scale it (left-drag). Use the sliders on the bottom to control contrast and brightness.
4. Add text: Insert–>Big ASCII Text. Type text and left-drag into position. You can also rescale text with right-drag.

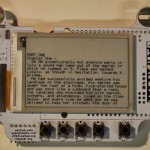
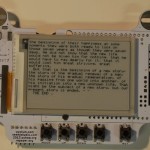
5. If your computer has an SD slot, you can save it directly to the SD card in the primary image location: “/ALBUM/A/A.WIF”. Now insert the SD card back into BADGEr and hit reset (far right button). Walla!
Have fun!
P.S. You can thank my office mate for getting DEVO stuck in your head.
UPDATE!
I’ve added some more features: invert, rotate, flip, and nudge your images. Tkinter allows you to detach menus from the menu bar. This is handy if you don’t like keyboard shortcuts.

 2. Install numpy by running the installer accepting defaults.