
When my WyoLum buddy in Boston, Kevin Osborn, built his “CNC AlaMode“, I just had to make one for myself too. Here’s how my build progressed.
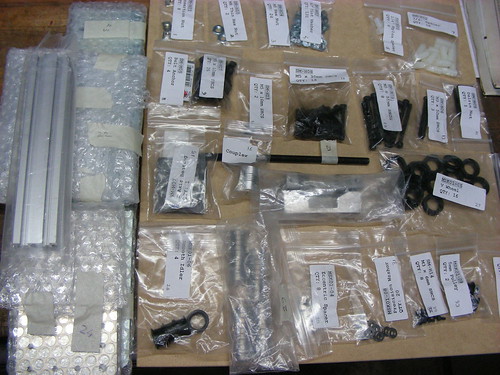
I ordered the Mechanical Kit from Inventables with Dual Y-Axis motor upgrade– without any motors or electronics. For good measure, I also added in two lengths of MakerSlide, hoping to extend the axes at a later date. Being on the other side of the globe has its disadvantages, and it took almost two months after ordering the kit before I could lay my hands on it in April.
There were a few small bits and pieces missing, but nothing that I couldn’t replace from my local collection of hardware.
The mechanical assembly seemed straightforward. But first order of business was tapping all the MakerSlides with a 5mm tap. The full kits come with the slides already tapped, but the Mechanical only kits need to be tapped. This is not something that can be rushed, even though it was a hefty 5mm tap in an open-ended hole – one slip of concentration, and it is highly likely you’ll end up snapping a tap inside the hole.
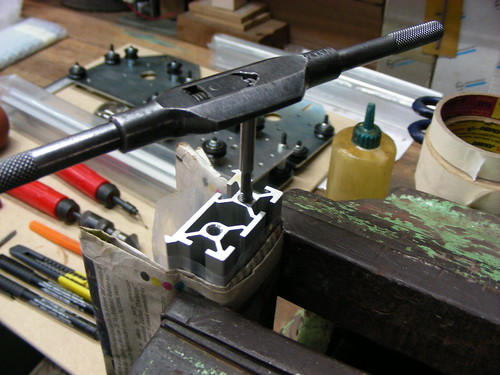
Aluminum is a pretty “sticky” material, so make sure you lubricate the taps with cutting fluid while tapping. In between tapping the holes – so I wouldn’t get bored and snap a bit – I simultaneously went about assembling some of the other parts.
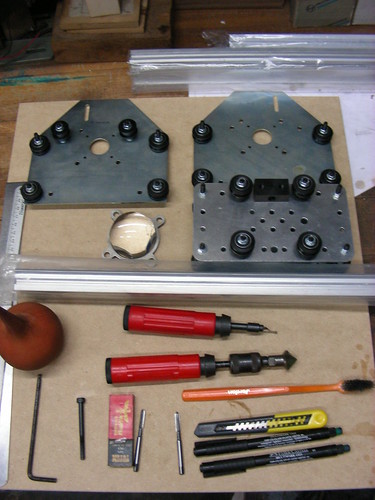
I did the initial assembly, but could not proceed further until I could manage to buy the stepper motors locally – which were out of stock.
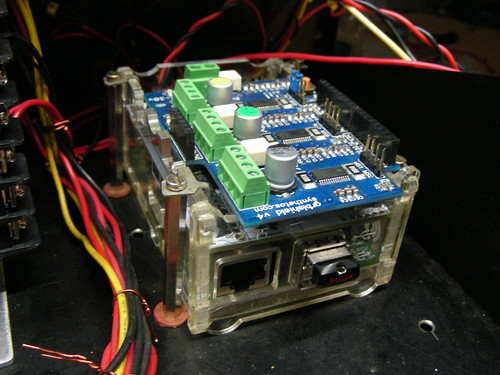
Meanwhile, I moved my attention to assembling the electronics. The computer for the ShapeOko would be a Raspberry-Pi, the microcontroller would be our very own AlaMode – an Arduino clone board, and the GRBLShield from Synthetos would drive the Motors.

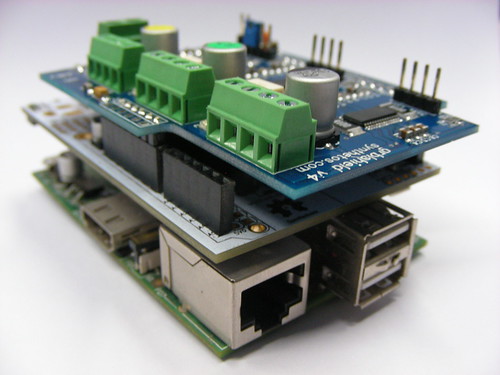
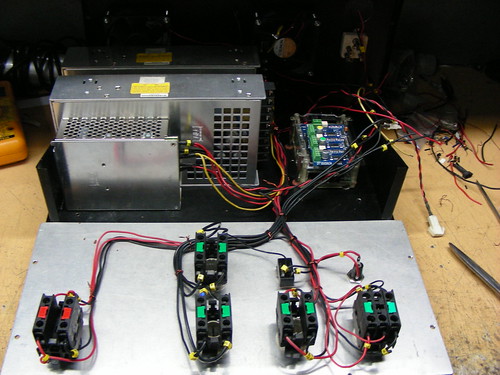
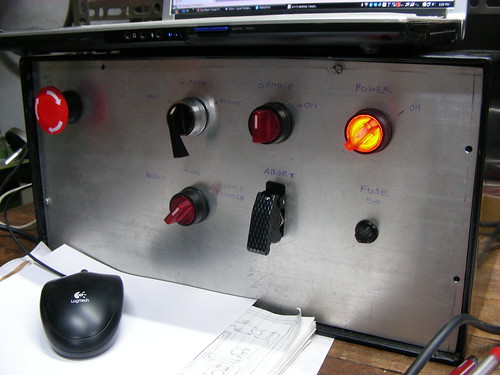
My plan was to put together a control box to house all the electronics. Here’s the full BoM :
- Computer : Raspberry-Pi
- Micro-controller : AlaMode (Wyolum’s Arduino clone – https://wyolum.com/projects/alamode/)
- Motor Drive : GRBLShield (Synthetos –https://www.inventables.com/technologies/grblshield-v4–2)
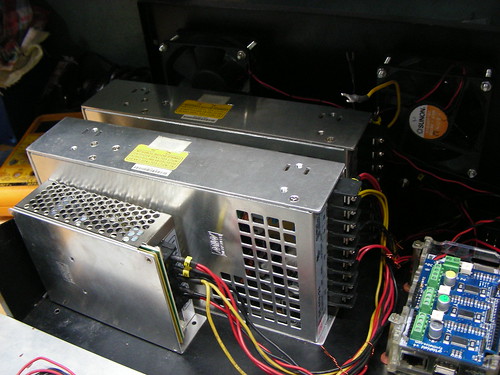
- Power Supply #1 : Meanwell P/N NES-50-5 : 5V, 50W, for Raspberry-Pi and AlaMode (http://www.meanwell.com/search/nes-50/default.htm)
- Power Supply #2 : Meanwell P/N SE-450-24 : 24V, 450W, for Stepper Motors (http://www.meanwell.com/search/se-450/default.htm)
- Power Supply #3 : Meanwell P/N SE-450-48 : 48V, 450W, for Spindle (http://www.meanwell.com/search/se-450/default.htm)
- WiFi Dongle for Raspberry-Pi (http://goo.gl/oordR)
- 16Gb USB Pen drive for storage of user data on Raspberry-Pi (http://goo.gl/vWCGq)
- Two Cooling Fans, 3” dia, 24 V DC (http://www.hicoolfans.com/products/compact-fans-DC.htm)
- Two screw terminal connector strips, 12 way (http://www.controlwell.com/stripconnectors.htm)
- Switch, DPST, Power ON (http://esbeeswitches.com/?p=1712)
- Switch, DPST, Spindle ON
- Switch, 2 way, center off, spring return : G-Code PAUSE – RESUME
- Switch, 2 way, center off – MODE : RESET (GRBL) – STEPPER ENABLE
- Switch, SPST – GRBL ABORT (https://www.sparkfun.com/products/9276)
- Fuse holder – 5x20mm, 5Amps
- Power socket outlet, 230V, 6A (to help power a laptop)
- Power socket inlet, 230V, 6A
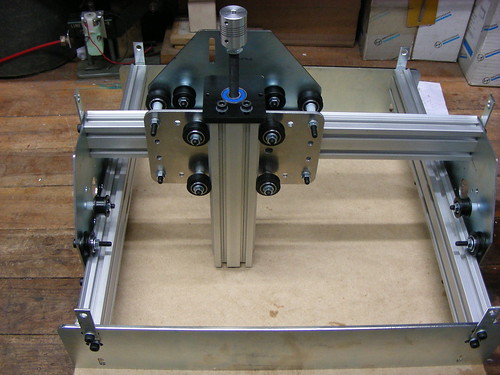
Once the motors arrived, I was able to complete the rest of the build quickly. One of the changes I made was to move the Y-axis drive pulleys on the outside. I had to move the Y-axis motors further away from the mounting brackets by about 20mm to accommodate the change. This extended the X-axis range by almost 40mm.
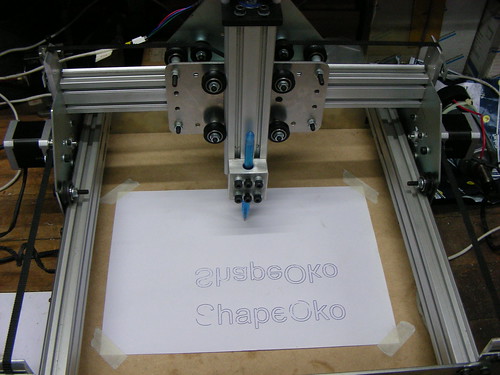
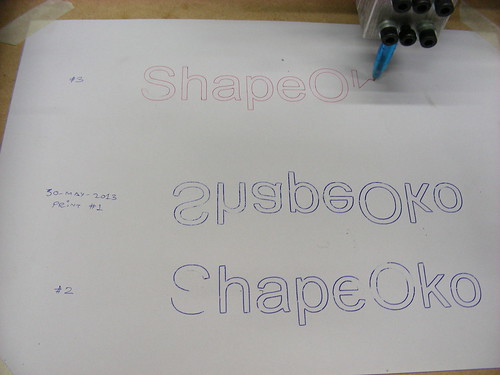
To do the initial “pen writing” trials, I made an aluminum block to allow mounting various types. My very first trial of the “ShapeOko” hello world was a mirror image. Turned out the dual Y-axis motors were running in reverse. I flipped a coil connection on both the motors, and the second trial was correct. I made a few more trials, using different pens, and printing some geometric patterns to check for any obvious errors in the right angles, circles and dimensions.
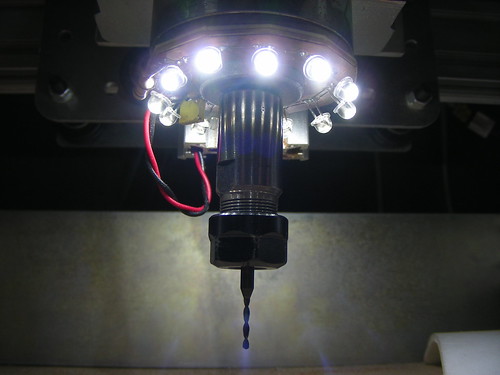
Once the pen trials were done, I mounted the 300W, 48V DC spindle with ER-11 collet, that I got off eBay.
cYvbwzg~~60_12.JPG)
Raspberry-Pi Setup
I’m not much of a software guy, so I mostly followed the nice set of instructions on the Adafruit Learning System – to install the OS and utilities on the SD Card. It’s important to set up SSH and also remote control using VNC or similar. This allows you to log in to the Raspberry-pi from a remote computer.
Next step would be to set up the AlaMode on the Raspberry-Pi. Detailed instructions are available at this link : AlaMode User Guide – http://goo.gl/DtQy3
Once Alamode setup is complete, it’s time to flash “GRBL” on the AlaMode. I downloaded the HEX file for GRBL Version v0.8c – http://bit.ly/SSdCJE – and flashed it on the AlaMode using XLoader. My Linux-Fu was not strong enough to figure out how to flash the HEX code directly from the Raspberry-Pi to the AlaMode.

The final piece in the software chain was a means of sending a G-code file from the Raspberry-Pi to the ShapeOko. Initially, I tried “Universal G-Code Sender (https://github.com/winder/Universal-G-Code-Sender)”, but that runs on Java.

Unfortunately, running UGCS slowed down my Raspberry-Pi to a crawl. The reason, it seems was that the Adafruit Occidentalis can only handle soft-float operations. The regular Raspbian OS can handle hard-float operation, and thus runs Java code more efficiently / faster. While trying to improve the situation, my luck ran out, and I ended up messing up the OS. Took me a fair bit of trial and error (and lots of hair-pulling) to get the Ras-Pi running correctly again.
At which point I decided it was just not worth the effort to continue using Java on the Raspberry-Pi, and I looked around for better options. Luckily, I found an awesome G-Code sender specifically written for GRBL, called GRBLController, by Zapmaker. There were some initial issues, like not being able to set up the Alamode port (TTYS0), etc. But a couple of exchanges with the author, and he quickly sorted it all out. We sent an AlaMode to Zapmaker for him to test it out – you can read his blog report on the Alamode.

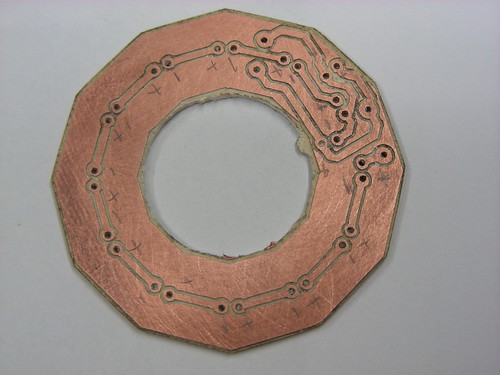
One of the first jobs I cut on the ShapeOko was a circular ring illuminator PCB which uses 12 LED’s to light up the cutting area under the spindle.
PCB Milling Video
Next on my list of things to do is
- Fixing end-stop / homing limit switches.
- Make schematic for the control panel I built, and post it in my next blog post.
- Describe the process for milling PCB’s on the ShapeOko
Pingback: ShapeOko build log — it’s a CNC mill in a box
Pingback: rndm(mod) » ShapeOko build log — it’s a CNC mill in a box
Pingback: ShapeOko build log — it’s a CNC mill in a box - RaspberryPiBoards
Pingback: ShapeOko build log — it’s a CNC mill in a box | Blog of MPRosa
Pingback: ShapeOko build log — it’s a CNC mill in a box | Make, Electronics projects, electronic Circuits, DIY projects, Microcontroller Projects - makeelectronic.com
Pingback: How to create an Open Source CNC | Alan C. Assis
Pingback: Asylum gets a ShapeOko CNC milling machine | Makers Asylum
Pingback: Asylum » Asylum gets a ShapeOko CNC milling machine
Pingback: Asylum gets a ShapeOko CNC milling machine - Maker's Asylum
Pingback: ShapeOko 2 tutorial – Dominion turntable | Woodworking blog
Pingback: Free Goodies, thanks to element14 - Maker's Asylum | Maker's Asylum