Alex CAD: 40 Minutes of Incredible Improvements
In a single focused session this morning (7:36 AM – 8:16 AM), we transformed Alex CAD with security patches, a major new feature, and comprehensive code refactoring.

What We Accomplished in 40 Minutes
Phase 1: Security Fixes (11 minutes)
Critical Vulnerability Patched
- CVE-2025-66418 Fixed: Updated urllib3 from 1.26.6 → 2.6.0
- Addressed unbounded decompression chain vulnerability
- Updated requests library for compatibility (2.26.0 → 2.32.3)
Dependency Modernization
Updated 24 packages from 2021 versions to modern 2024-2025 releases:
- matplotlib: 3.4.2 → 3.9.4
- numpy: 1.20.1 → 1.26.4
- scipy: 1.7.1 → 1.13.1
- Pillow: 8.1.0 → 11.3.0
Phase 2: Dual Monitor Fix (10 minutes)
Fixed a frustrating issue where Alex’s window would span across both monitors on dual-monitor setups.
Phase 3: Dynamic Panel Resizing (9 minutes)
This was the game-changer! We completely reimagined the view layout:
What Changed
- Before: Fixed grid layout with unchangeable panel sizes
- After: Fully resizable panels with draggable dividers
Technical Implementation
- Replaced Tkinter grid layout with nested PanedWindow widgets
- Created 2×2 grid of resizable view panels (Top, Side, Front, Iso)
- Added resize event handlers to IsoView class
- Views automatically recenter when panels resize
- Zoom levels preserved during resize operations
Phase 4: Code Quality Refactoring (10 minutes)
We performed a comprehensive refactoring to improve long-term maintainability:
New Modules Created:
- ViewConfig – Centralized configuration constants
- ViewPanel – Reusable panel component (eliminated ~40 lines of duplication)
- view_layout – Separated layout logic (reduced AlexCAD.py by ~90 lines)
Improvements:
- Improved resize handler with robust debouncing
- Added type hints throughout for better IDE support
Impact Metrics
Code Quality
- Reduced duplication: ~40 lines eliminated
- Improved organization: 3 new focused modules
- Net reduction: ~90 lines in main file
- Type safety: Type hints throughout
Files Changed
- +370 insertions, -101 deletions
- 3 new modules created
- 5 files modified
Key Takeaways
- Security First: Immediately addressed the critical vulnerability
- User-Focused: Implemented the requested dynamic resizing feature
- Quality Matters: Didn’t stop at “working” – refactored for maintainability
- Clean Process: Proper git workflow with feature branches
- Zero Downtime: Alex remained functional throughout all changes
Try It Yourself
Alex CAD is open source! Check out the repository at github.com/wyolum/Alex
The resizable panels feature makes it easier than ever to customize your workspace for aluminum extrusion design projects.
This incredible 40-minute session demonstrates what’s possible when you combine focused effort, modern tools, and a commitment to code quality. From security vulnerability to fully refactored, feature-enhanced application – all in less time than a typical meeting!
 A couple of weeks ago, I noticed a pair of old, first version
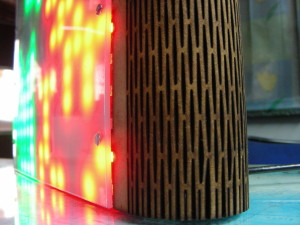
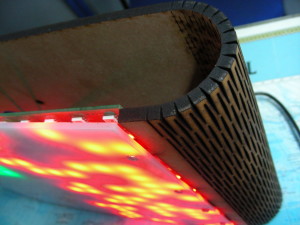
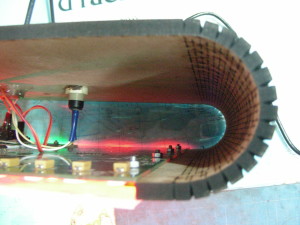
  TiM (The intelligent Matrix) is an array of 8×16 individually addressable 5050-WS2811 RGB “smart” pixels. It is essentially 8 rows of 16 LED’s but with a very flexible connection scheme that allows you to control the whole array (128 LEDs) with a single pin or up to 10 boards (1280 pixels) chained together using 8 input pins. TiM boards can be linked together to create larger matrices. Stacking can be done in the vertical and horizontal orientations, and the pitch between individual LEDs is maintained when boards are stacked. Here’s the
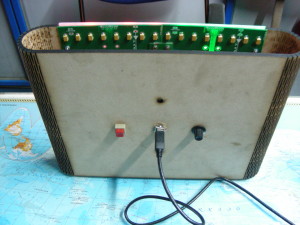
  I had two boards on hand, which I joined together to form a 16×16 matrix of 256 LEDs. TiM boards need an external controller, and I used an Arduino Clone that I designed for use at the Maker’s Asylum called
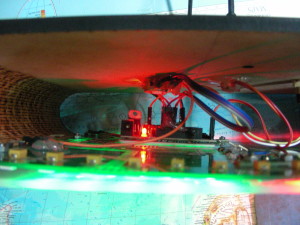
  For the software, I tried some code I found on the web, but none of it did what I wanted – change modes by pressing the button, and change colors using the potentiometer. I can’t code if my life depended on it, so I chucked the problem at my go-to guys – Justin and Kevin. Justin is quick, like the Energizer bunny, and threw back code at me on the rebound. But it required using four potentiometer’s to control the colors. Since the HW was already wired up, I waited to see Kevin came up with something different, which he did. Nice code which allowed different modes to be selected by a button press. The first mode is the standard Rainbow colors from Adafruit’s StrandTest. Then, there’s a color changing mode, Breathing LEDs, Connection Machine (which looks something like Conway’s Game of Life), and finally a scrolling Text mode. This is enough to start with, and I’m sure if anyone at the Asylum wants to hack and dig in to the
  I designed the