C3Jr 3D Printed Stand

It’s been a while….

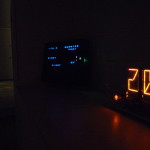
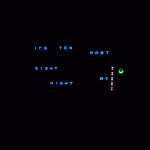
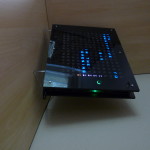
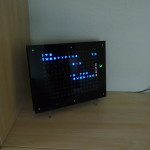
Having played with 3D printers for a bit now, I thought it would be a good idea to elevate my C3Jr clock a little and make a stand for it. I recently put together a Prusa i3 MK2 printer from a kit, and it’s Open Source at its best! To break it in, I used it to make the stand! This would help with not only keeping the clock more secure (if it’s a desktop clock) but also add a little flair to the C3Jr. It’s nothing too fancy, but I think it turned out OK. The print was a 50% honeycomb infill to give it some strength and the STL file will be available on our GitHub in the usual place. Enjoy! Any questions, then shoot us an email. 

Uploading the New and Improved ClockTHREE Jr. Code

Hello! My last blog was about updating the ClockTHREE Jr. software, however, today I will be writing about the process of uploading the code all the way from the Arduino IDE to the master GitHub repository. Once I got the hang of it, the process was as easy as printing “Hello World” with Python.

  1. First, I downloaded Git on my Ubuntu Linux computer using the command “sudo apt get update” and then “sudo apt-get install git.” However, you can also just install it from the URL listed here: https://git-scm.com/downloads
  2. The, I logged into my own GitHub account and opened up the Wyloum repository. From there, I clicked the ClockTHREE Jr. tab.
  3. Once there, I forked the repository by pressing the (Well what do you know?) “Fork” button in the top right corner. This created a branch of the master Wyolum ClockTHREEJr repository in my own account. I did this so I can freely modify the code without affecting the master repository.

Screenshot from 2016-07-24 15-59-47

4. After clicking the Fork button, I went back to my personal account and I had the forked repository as rohanius/ClockTHREEjr. Next I cloned this repository to my hard drive. I did this by copying the git link by pressing the green button labeled “Clone or Download” (Make sure that when you push the button, the words “Clone with HTTPS” appear, not “Clone with SSH”).

Screenshot from 2016-07-24 16-37-52

5. I then opened a terminal and made sure that it was currently pointing to my “projects” folder (make sure next to the original line it says /projects). After that, type in “git clone https://github.com/rohanius/ClockTHREEjr.git”. This cloned the repository to my hard drive and created a folder in my “projects” folder and named it the same name as the repository – ClockTHREEjr

Screenshot from 2016-07-24 16-08-31

6. I was then able to edit the code as I pleased in my local repository.

7. After accordingly editing the code (which I explained in my previous blog), After compiling and testing that my code changes worked, I opened the terminal once again and changed the current directory to be /home/rohan/projects/ClockTHREEjr

8. In that directory, I typed “git commit -a -m “Updated code for Arduino 1.6.9”. This command committed all my local changes to the local git repository that I had cloned.

Screenshot from 2016-07-24 16-17-42

“-a” means “all the files in that directory that have been modified” and “-m” just allowed me to type a small message once I committed the code.

9. After committing the code, I simply pushed it to my GitHub repository using the command “git push”

Screenshot from 2016-07-24 16-19-54

10. Finally, I went back to my GitHub repository (rohanius/ClockTHREEJr.) and clicked the pull request tab. From there, I made a new pull request for the original owner of the ClockTHREE Jr. repository. Mr. Shaw was then able to pull all my changed and merge them to the master ClockTHREE Jr. repository.

Screenshot from 2016-07-24 16-23-37

Chronogram2 – A Modern Timepiece

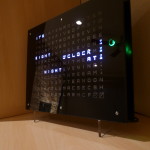
If you’re at all familiar with the C3Jr (which you should be given you’re reading the WyoLum blog..;-), then you may know about it’s larger sibling the Chronogram2. Originally offered as part of the Kickstarter campaign, it’s two C3Jr’s combined to tell time minute by minute in glorious fashion. Here’s how to put one together (see attached PDF)!

P1050585

Chronogram2 Construction

A Little (Time)Piece of History…

P1050141
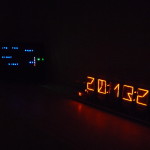
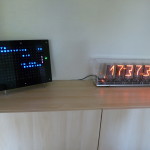
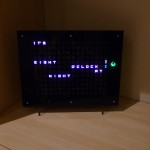
This is where it all began for me, the discovery of the unique ClockTHREE on Kickstarter. As an avid fan of putting electronic kits together, especially those of the time-telling variety, I couldn’t resist the opportunity to own a ClockTHREE and decided to put one together. This also served as my introduction to Justin and the ingenious team at WyoLum and after several years of building ClockTHREE Jr’s for friends and colleagues I was flattered to join the team and try and contribute new ideas! I recently spruced my ClockTHREE up and positioned it ‘pride of place’ in my new living room along with another cherished time-piece (see photos). Interested in owning a unique timepiece? Check out the ClockTHREE Jr here at WyoLum.com and build one of your own. [available here]


Programming ClockTHREEjr_v2

At some point, you may wish to re-program your ClockTHREEjr_v2 or maybe you are building a clock from scratch.  This post will walk you through the steps.

Outline:

  1. Download and install Arduino for your target platform.  (More details can be found here.)
    • Navigate to the Arduino download site: http://arduino.cc/en/Main/Software
    • Download Arduino for your platform.
    • Unzip the file to the directory of your choice.  (We will refer to whatever directory you choose as <arduino_dir>).  I use c:\arduino\ on Windows or /home/justin/arduino/ on Linux so that (for arduino 1.0 for instance) the path extracted executable is c:\arduino\arduino-1.0\arduino.exe on Windows or /home/justin/arduino/arduino-1.0/arduino on Linux.
  2. Download and install ClockTHREE source code
    • Download the latest ClockTHREE library source code file from here: http://code.google.com/p/clockthree/downloads/list
    • Unzip the library source code file in your home directory. I use “My Documents\sketechbook\” on windows and /home/justin/sketchbook/ on linux.  We will refer to the directory you choose as <sketchbook>.
  3. IMPORTANT: Point Arduino to your newly extracted library files.
    • Start arduino (look here if you have trouble with this step)
    • Click File->Preferences to pull up the preferences menu.
    • Leave “Use external editor” unchecked if you plan on using Arduino as your editor.
    • Click the “Browse” button and navigate to your <sketchbook> directory from step 2.
    • Click “OK”.
    • Close and restart Arduino
    • Click “File->Sketchbook->libraries”.  If “ClockTHREE” is listed you’ve done well.
  4. Using a text editor, edit source code:
    • On or about line 32 of <sketchbook>/libraries/ClockTHREE/examples/ClockTHREE_04/ClockTHREE_04.ino, comment out all but one of the following lines depending on language and hardware.
    // #include "dutch_v1.h"
    // #include "english_v0.h"
    // #include "english_v2.h"
    #include "english_v3.h"
    // #include "french_v1.h"
    // #include "german_v1.h"
    // #include "german_v3.h"
    // #include "german_v5.h"
    // #include "hebrew_v1.h"
  5. Compile and upload
    • Connect the FTDI cable to ClockTHREE (mind color labels) and to your computer.
    • Click Tools->Boards->Duemilanove
    • Select USB port Tools->Serial Port (this may take some trial and error if you have several devices connected).
    • Compile and upload <sketchbook>/libraries/ClockTHREE/examples/ClockTHREE_04/ClockTHREE_04.ino.
      Click the arrow button, second from the right.  
  6. Congratulations!  That is it.  Now you can customize the code to your hearts content!